Overview
Normally in a UIKit control, you would modify the appearance of the control or replace the specified control with another control based on some business logic. In react-native, we display components. We can modify how the component is displayed based on it’s state. Let’s see how that works.
Content
What do we use state for? Why should you know how to use it? Well a great example is the NagivatorIOS which is based on UINavigationController. You can find out more about how to use the UINavigationController here.
Let’s see what such a component looks like in react-native.
1
2
3
4
5
6
7
8
9
10
11
12
13
14
15
16
17
18
19
20
21
22
23
24
25
26
27
28
29
30
31
32
33
class TwoTabComponent extends Component {
    constructor(props) {
        super(props);
        this.state = {
            selectedTab: 'home'
        };
    }

    render() {
        return (
            <TabBarIOS
              selectedTab={this.state.selectedTab}>
                  <TabBarIOS.Item
                    title="Home"
                    selected={this.state.selectedTab === 'home'}
                    onPress={() => {
                        this.setState({ selectedTab: 'home' });
                    }}>
                      <Home />
                  </TabBarIOS.Item>

                  <TabBarIOS.Item
                    title="Settings"
                    selected={this.state.selectedTab === 'settings'}
                    onPress={() => {
                        this.setState({ selectedTab: 'settings' });
                    }}>
                      <Settings />
                  </TabBarIOS.Item>
            </TabBarIOS>
        )
    }
}
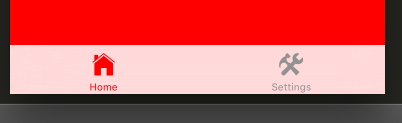
The TwoTabComponent will create a view with two tabs at the bottom of the screen.
When the user pressed on one of the tabs, the state changes to show the new view. Pressing the ‘Home’ button displays the <Home /> control and pressing the Settings button displays the <Settings /> control. Of course, both of those controls are created the same way we created TwoTabComponent (with a render function).
We initialize the state in the constructor with this.state = { stateProperty: 'initialState' }. To change the state, we have to call this.setState({ stateProperty: 'newState' }).